
Turbocharger : General Installation Tips
Turbocharger Replacement : A Step-by-Step Guide
A failed turbocharger can bring your vehicle’s performance to a grinding halt—literally. Whether you're dealing with loss of power, excessive smoke, or strange noises under the hood, replacing a damaged turbo is essential to restoring your engine’s efficiency and responsiveness. In this guide, we’ll walk you through the process of installing a new unit, with practical tips to help you avoid common pitfalls. Whether you're a DIY mechanic or just looking to understand the process before heading to the shop, this article will give you the confidence to tackle turbocharger replacement the right way.
Note: This guide provides general instructions for replacing a turbocharger and may not reflect the specific procedures required for your vehicle. Always refer to your vehicle manufacturer’s service manual or official documentation for exact specifications, torque settings, and installation steps. Following manufacturer recommendations is essential to ensure proper fitment, performance, and safety.
Step 1: Before Replacing A Turbo |
|
 |
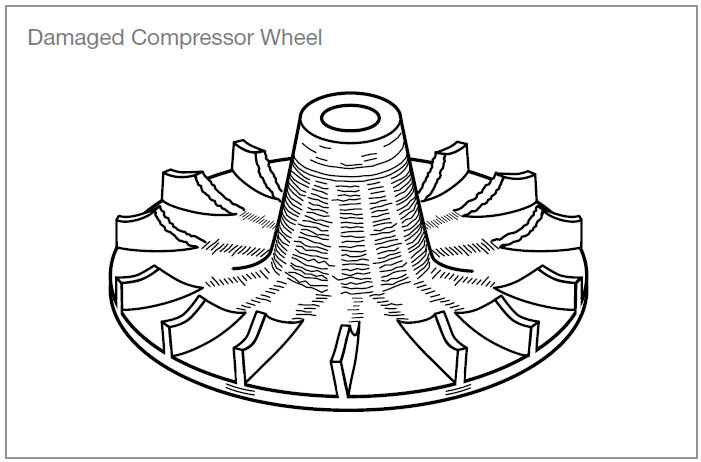
Before proceeding with a turbocharger replacement, it's essential to perform a comprehensive diagnostic of the engine system. Many symptoms commonly attributed to turbo failure—such as reduced power, unusual noises, excessive smoke, or increased oil consumption—can also result from other underlying issues.Potential culprits include:
Additionally, check the crankcase pressure against the engine manufacturer's specifications. Elevated crankcase pressure can force oil past seals and into the turbocharger’s inlet or exhaust systems, mimicking turbo failure symptoms. Identifying and resolving these issues first can prevent unnecessary replacement and ensure long-term reliability. |
Step 2: Before Replacing A Turbo |
|
 |
If the engine diagnostic check does not uncover any obvious cause, make sure that an extensive trouble shooting analysis is completed.Key turbocharger areas for examination include foreign objects, lack of lubrication, oil contamination, over-speeding of the turbo and excessive temperature. This is important because turbo damage can often be a symptom of an underlying problem rather than the cause itself. Our website has more detailed information on this subject – please click here to learn more. |
Step 3: Turbo Installation |
|
 |
The following steps must be strictly followed. Always consult the workshop manual for instructions which are specific to your engine or vehicle.
Check the part number to ensure that it is the right one for the engine.Installing the incorrect turbo to an engine may damage the turbo and/or the engine and will void the warranty. If in doubt, check with your Official Distributor. |
Step 4: Turbo Installation |
|
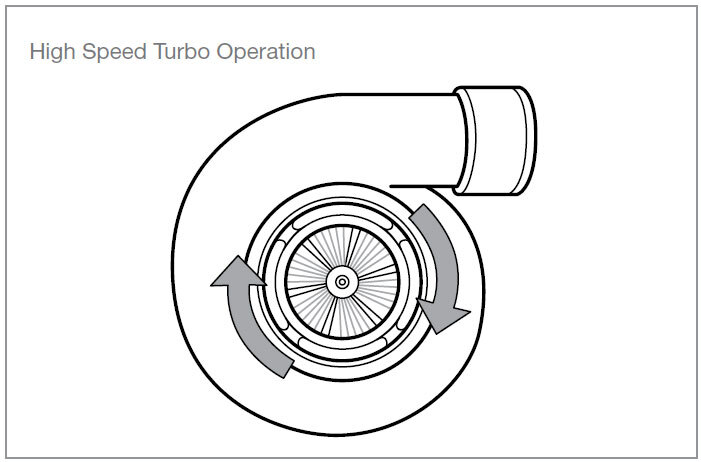 |
It is important that during the whole installation process, you prevent dirt or debris from entering any part of the turbo.Any dirt or debris entering the turbo may cause catastrophic damage due to the very high speed of operation (up to 300,000rpm). |
Step 5: Turbo Installation |
|
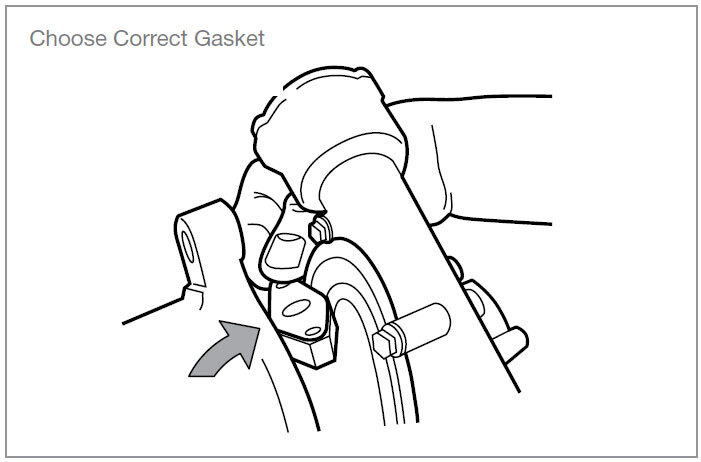 |
Ensure that correct gaskets are used.For example - the center hole of any gasket must be perfectly aligned with the center hole of the turbo flange. Some turbos use a threaded connector and no gasket. Some turbos use a “banjo fitting” with “banjo bolt”; in these cases, use new sealing gaskets/washers. Important Note: Do not use liquid gasket or sealants, particularly for the oil inlet or outlet since excessive material may enter the turbo, reducing or stopping oil flow. |
Step 6: Turbo Installation |
|
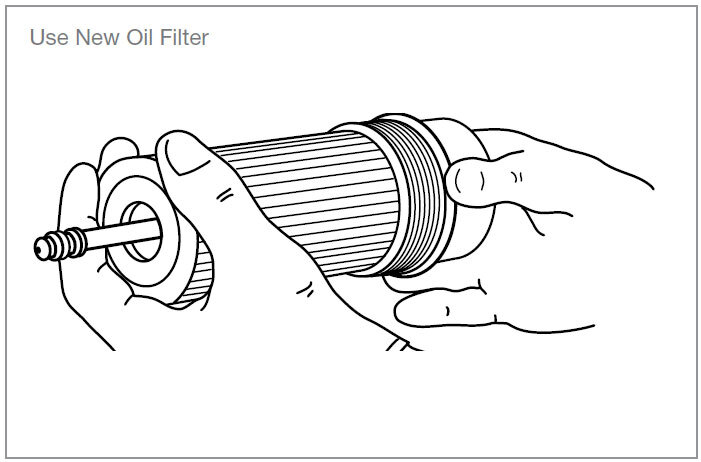 |
It is recommended that you use new air, oil and fuel filters and clean engine oil to the engine or vehicle maker’s specification.When installing the new oil filter, if possible, fill it with clean, fresh engine oil. Also, if it is accessible, back-fill the pressure line from the oil pump to the filter. This is particularly important on high mileage engines, where the oil pressure line may empty during oil changes! |
Step 7: Turbo Installation |
|
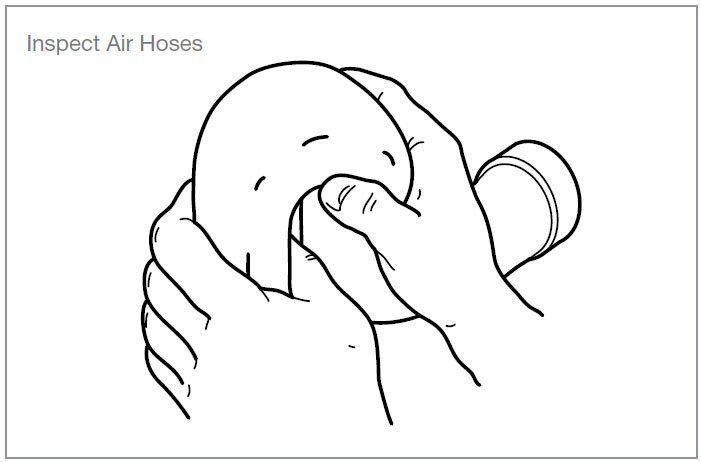 |
Before installing the turbo, ensure that all air hoses connected to the turbo are totally clean and show no sign of any damage. |
Step 8: Turbo Installation |
|
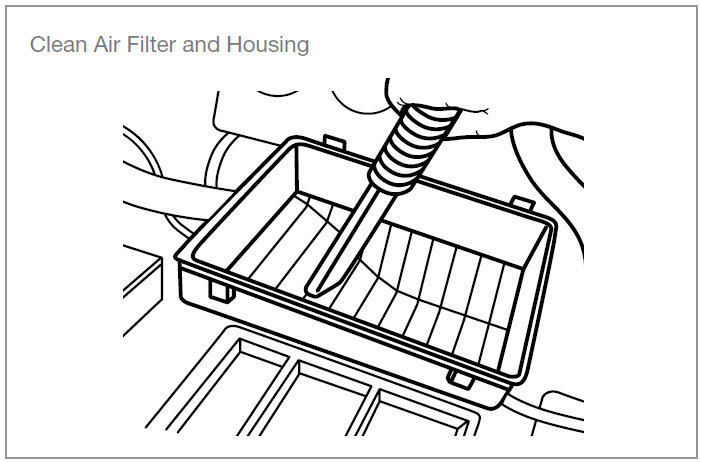 |
The air filter and its housing must be completely clean and free from any debris. |
Step 9: Turbo Installation |
|
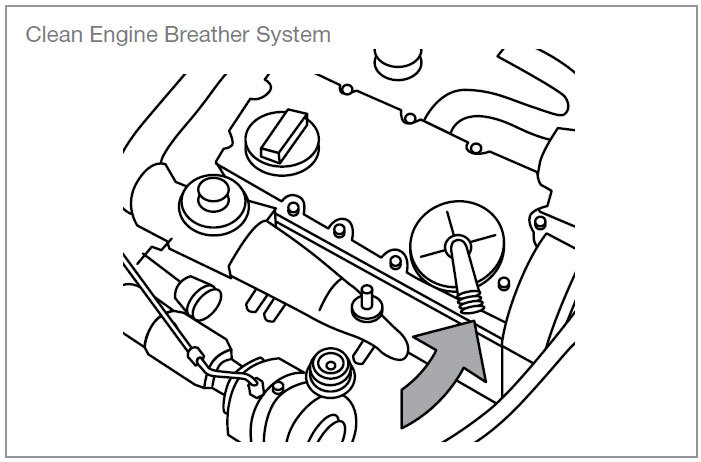 |
Clean the engine breather system (Positive Crankcase Ventilation system) and ensure that it functions properly.Any blockages or malfunction may cause high crankcase pressure and lead to oil leakage from the turbo into the inlet and exhaust systems. |
Step 10: Turbo Installation |
|
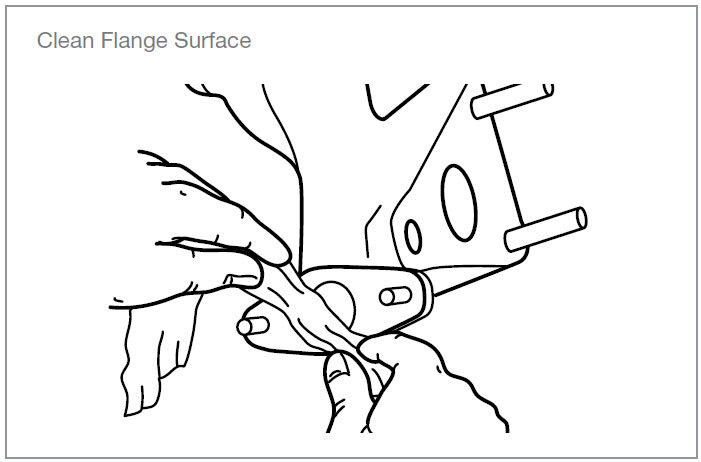 |
Remove any old gasket material from the exhaust manifold and pipe.The surfaces of the flange must be clean and have no damage. Then remove plastic or foam blanking plugs from the turbo. |
Step 11: Turbo Installation |
|
 |
Position the turbo onto manifold or engine block using the correct new gasket or O-ring, and then reconnect the exhaust pipe.tighten all nuts and bolts to engine specifications.* |
Important Note for Steps 12-15 Pay special attention to oil feed and drain lines, which must be totally clean and have no damage to ensure unrestricted oil flow. Make sure that flexible hose liners have not collapsed internally and that the oil feed line is not too close to source of heat which may have damaged the oil feed line internally. This is common on some vehicles and difficult to detect without cutting the pipe! For this reason, we recommend fitting a new oil inlet pipe when installing the new turbo. |
|
Step 12: Turbo Installation |
|
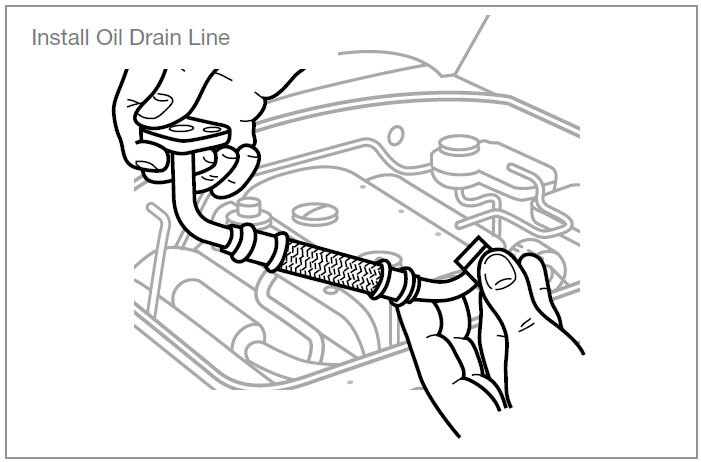 |
Next, install oil drain line to the turbocharger. |
Step 13: Turbo Installation |
|
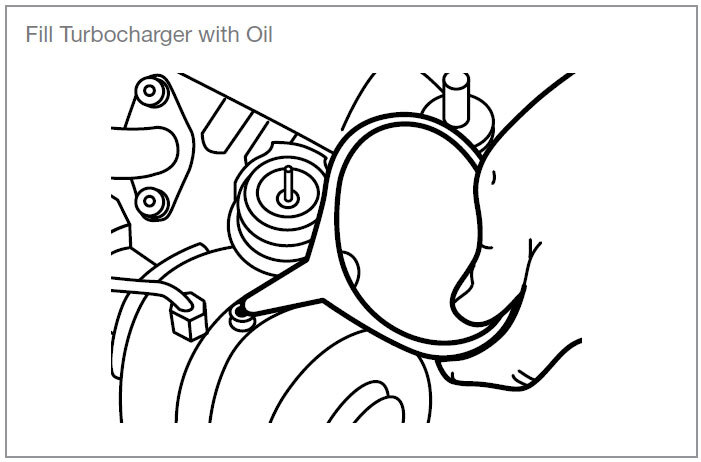 |
Pour new engine oil into the oil inlet hole of the turbocharger. |
Step 14: Turbo Installation |
|
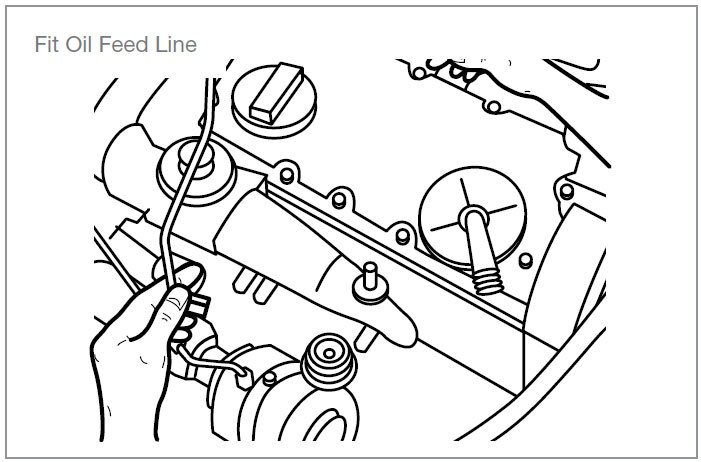 |
Next, fit the new oil feed line. |
Step 15: Turbo Installation |
|
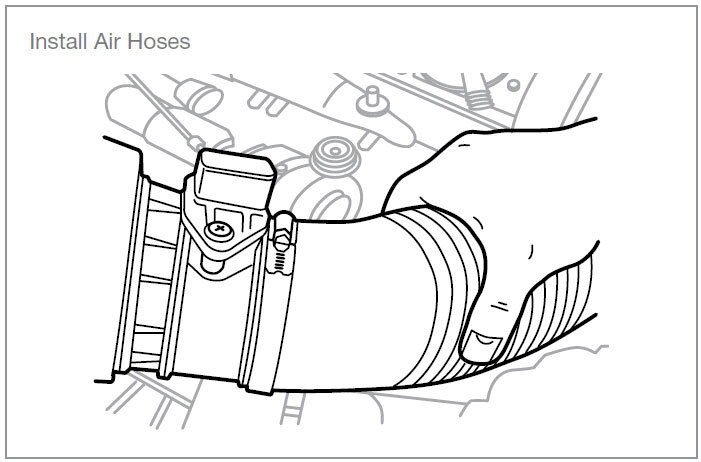 |
Install inlet and outlet air hoses to turbocharger compressor housing.Make sure that the connections are airtight and hose clamps are correctly tightened.* |
Step 16: Turbo Installation |
|
 |
Crank the engine for 10 - 15 seconds without starting the engine.If possible, disable the fuelling/ignition or use compression test mode to allow this. This helps to prime the oil feed to the turbocharger by filling the oil pressure lines, oil filter and turbo with oil before start-up. Important Note: As soon as the engine starts, the turbo will run at high speed and a lack of lubrication in these vital first few seconds can destroy a brand new turbo. |
Step 17: Turbo Installation |
|
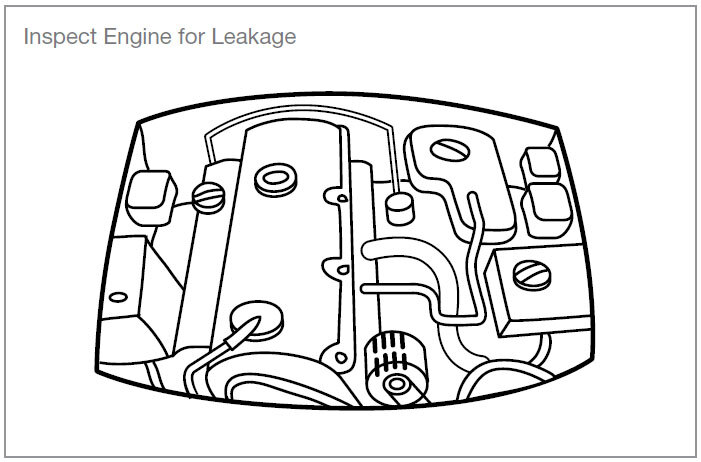 |
Then start the engine, and let it idle for 3 to 4 minutes to allow for proper inspection of oil, gas and air leakage.If any leakage is detected during engine start up, fix the issue immediately. |
Step 18: Turbo Installation |
|
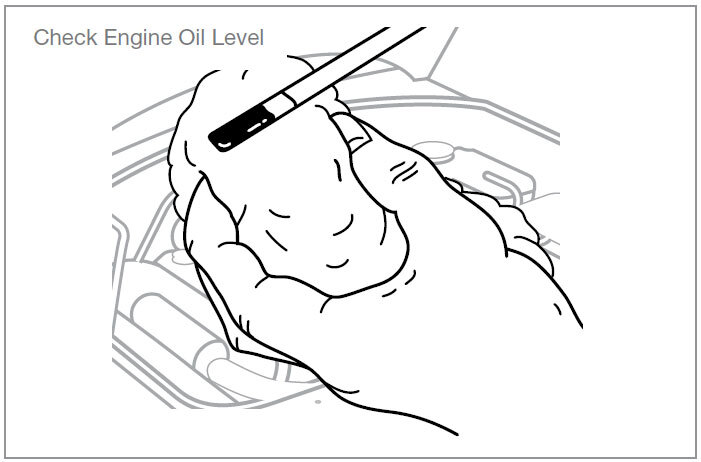 |
Stop the engine and re-check engine oil level.Oil level should be between the minimum and maximum mark on the dipstick - it is important to make sure that oil level is not above the point where turbo oil drain pipe connects to the engine or this may lead to oil leakage from the turbo into the inlet and exhaust systems. |
Again, Please Note: This guide provides general instructions for replacing a turbocharger and may not reflect the specific procedures required for your vehicle. Always refer to your vehicle manufacturer’s service manual or official documentation for exact specifications, torque settings, and installation steps. Following manufacturer recommendations is essential to ensure proper fitment, performance, and safety.
Recent Posts
-

Innovation of Garrett Turbochargers
The Legacy and Innovation of Garrett Turbochargers When it comes to turbocharging technology, few na …Nov 4th 2025 -

Ford 7.3L Powerstroke F8C HPOP
Featured Product: Grizzly F8C High-Pressure Oil Pump If you're driving a 1999.5–2003 Ford 7.3L Power …Oct 17th 2025 -

Why the Grizzly 10R8899 High-Pressure Oil Pump Is a Must-Have for Caterpillar C7 Owners
Why the Grizzly 10R8899 High-Pressure Oil Pump Is a Must-Have for Caterpillar C7 Owners When it come …Oct 6th 2025